Curves, LFOs, Remaps, and Shapes
Editors
Looping
Control Point Tool
Free Draw Tool
Stepped Draw Tool
Overview

The LFO modulator uses a "1-dimensional" shape to describe a waveform, which can then be used at comparatively low frequencies to control other values. Curve, Remap, and Shaper use very similar data to do their respective tasks.
There are small differences in how the data is interpreted between the three types, which makes it hard to repurpose a LFO waveform as a Curve for example. LFOs naturally loop, which makes it so that the last control point on the line is also the first one in a sense. This isn't true for a Curve shape with a clear beginning and end. Because of this it is not possible to load data of one type in another editor, even though they might seem similar.
Editors
The popup editors for the 1-dimensional shapes comes in three variations. They share a lot of functionality and are used to create or edit the various curves. Pictured below is the Curve Editor. Most of the interface elements are the same for the LFO, Remap, and Shaper Editors.
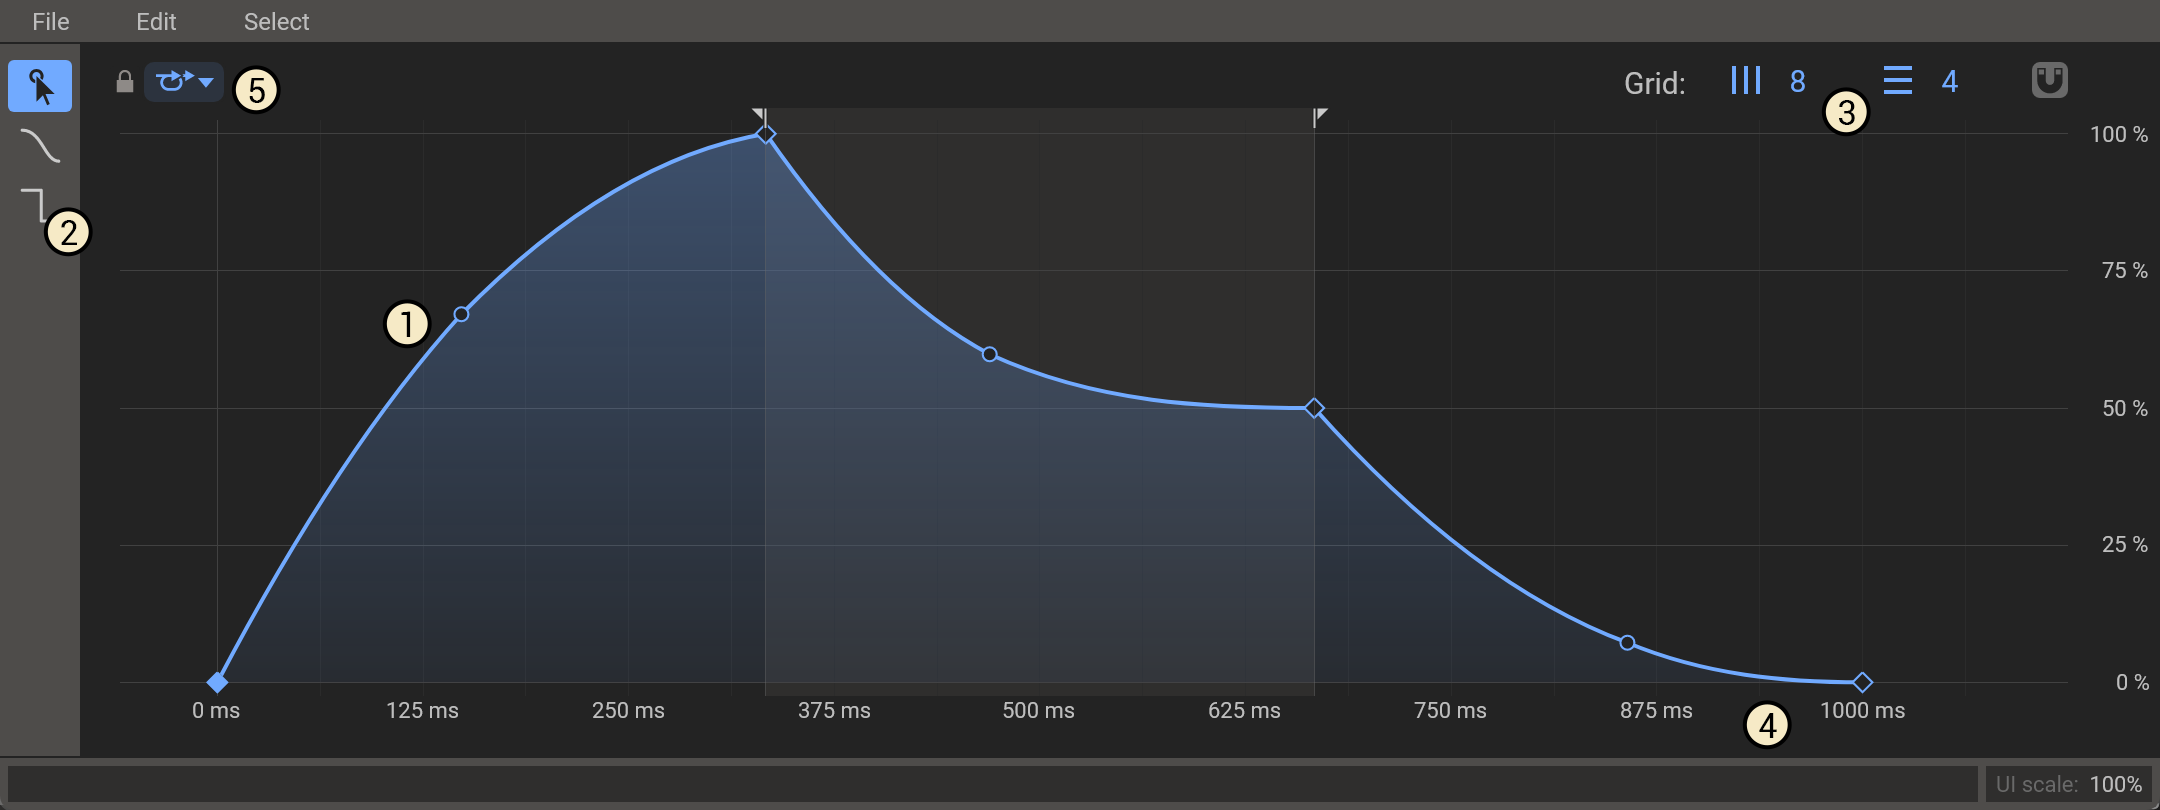
- Main workspace area.
- At the left side of the screen is the toolbar. The Control Point Tool is selected by default. Click the other tool buttons to select them.
- At the top right you will find grid controls for horizontal and vertical grid divisions, as well as a magnet button for turning grid snapping on and off. You can also temporarily toggle snapping by holding down the ctrl/cmd (Win/Mac) key.
- The view can be zoomed by using the scroll wheel on the horizontal axis below the curve, and panned by clicking and dragging on the axis.
- The loop mode selector.
Looping
The loop mode selector and the loop handles are available in the Curve Editor only, and are not present in the LFO, Remap, or Shaper Editors. The loop handles can be set to the whole length of the curve, or just a part of it. It is even possible to set both handles to the same point, forcing the curve to stay at that value until the loop ends. There are several loop modes:
- Off
- No loop. The curve will play through once exactly as drawn and then hold on the last control point value.
- Infinite
- Playback will loop through the loop area from left to right until the voice dies. Any part of the curve that is to the right of the loop end handle will never be played.
- Sustain
- Playback will loop through the loop area from left to right until the note is released, at which point it will continue from where it is and ignore the loop handle. Any part of the curve that is to the right of the loop end handle will be played in the release phase of the voice.
- Ping Pong
- Playback will loop through the loop area from left to right and then change direction, bouncing back and forth until the voice dies. Any part of the curve that is to the right of the loop end handle will never be played.
- Reverse
- Playback will go through the loop area from left to right and then loop from right to left until the voice dies. Any part of the curve that is to the right of the loop end handle will never be played.
Control Point Tool
You can move control points around by clicking and dragging. Double clicking anywhere on the curve or an empty area creates a new control point. Double clicking a control point removes it. Holding shift while moving a control point enables finer adjustment, and holding control temporarily enables or disables the grid snapping. Clicking and dragging on the curve rather than on a control point modifies the slope of the curve. By clicking close to a control point the slope to/from that specific control point is adjusted, while clicking closer to the middle adjusts the slope of both control points at once.
Right clicking a control point opens a context menu that allows for numerical coordinate entry, but also toggling the smoothing mode of the selected control points. Smoothing can also be toggled by control double clicking a control point.
Clicking and dragging an empty area or while holding down shift lets you select multiple points at once. Selected control points can be modified all at once, or deleted by pressing delete or backspace.
Free Draw Tool
The free draw tool allows you to freely draw any shape, as the name suggests.
Stepped Draw Tool
Stepped drawing will always snap to the horizontal grid and draw vertical bars, whether grid snapping is enabled or not. This allows you draw patterns the same way you would in a step sequencer.