Multipass
User interface
Signal path
Band splitter
Lanes
Multiple outputs
Snapin mode
Overview
Multipass is a multiband effect plugin with many uses. At the heart of the plugin is a band splitter which splits the audio into several different frequency bands which can be have custom effects chains applied to them independently. Effect chains are built by combining and modulating Snapins in the effects lanes. Snapins come in many different flavors, and implements many classic effects like Distortion or Chorus as well as more unusual ones like Formant Filtering and Frequency Shifting. Multipass itself can also be used as a Snapin.
In addition to being loaded into Multipass, snapins can also be loaded as plugins directly in your DAW. Multipass is bundled with a large selection of snapins, and additional premium effects can be bought individually or in a bundle.
User interface
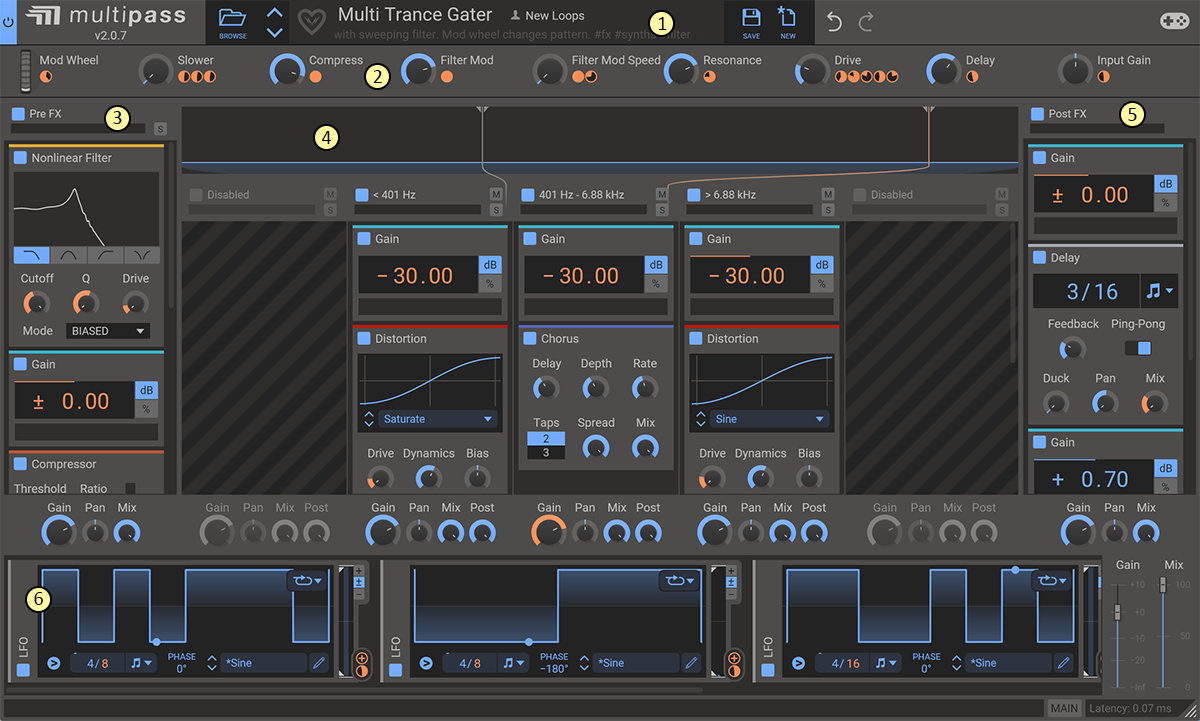
This is an overview of the plugin UI. It may look a bit overwhelming at first so let's break it down.
- In the top bar the name, author and description of the current patch is shown. By clicking the 'Browse' button you toggle the preset browser. To the right you will find 'Undo' and 'Redo' buttons, allowing you to undo or redo all actions in Multipass.
- The eight large knobs under the patch name are known as the macro knobs. These knobs can be routed by the sound designer to any other parameters in the patch in order to provide a few easy-to-reach knobs for tuning the sound of the patch. A single macro knob can even be routed to several parameters.
- The left-most lane is dedicated to effects you might want to apply before the band-splitting occurs.
- The large spectrum displayed in the middle of the plugin is the band splitter. It splits the audio signal into up to five different frequency bands which can be processed independently. The five lanes below the band splitter can each hold any number of Snapins. Adding new Snapins is as easy as clicking the empty space at the bottom of a lane.
- The right-most lane lets you add additional effects after the bands have been mixed back together.
- Running along the bottom of the UI is the modulation lane. Read more in the modulation chapter.
Signal path
Now that we have some intuition on what parts make up Multipass and where to find them on the screen, let's take a peek under the hood to see how Multipass processes the audio you send into it.
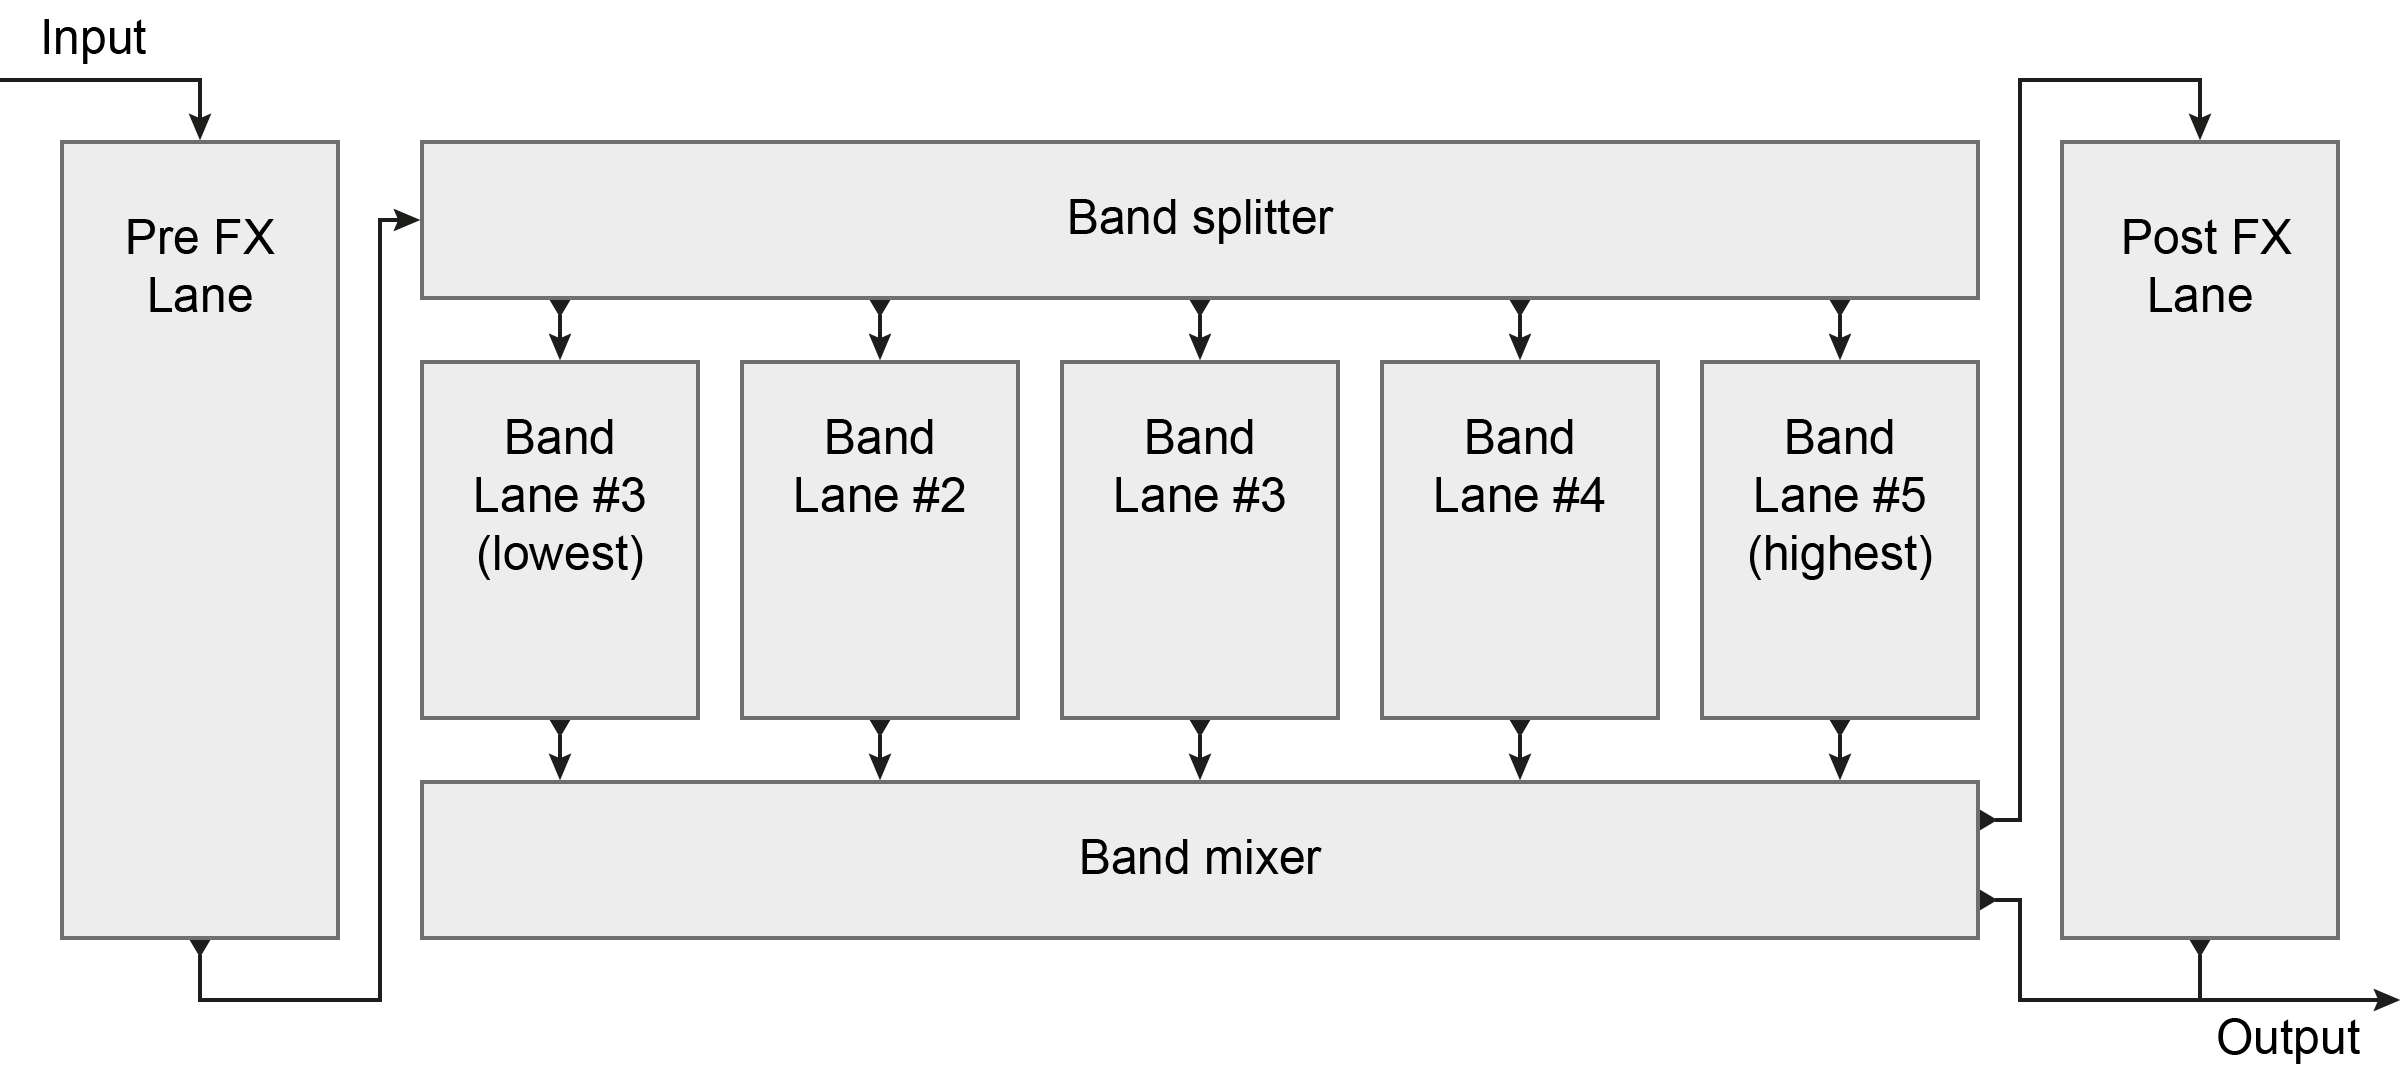
The figure above is a schematic of the signal path through Multipass. The audio signal enters the plugin in the top left corner, and passes through a few stages of processing before leaving at the bottom right. Let's take a look at each of the stages in turn.
- Pre FX Lane
- Before reaching the band splitter the signal will pass through the pre FX lane where Snapins can be added which will affect the signal as a whole before band splitting.
- Band splitter
- Next up is the band splitter, which splits the signal into up to five bands and sends each band into its own band lane. The band splitter uses Linkwitz–Riley crossover filters, which ensure that a flat frequency response is achieved when the bands are mixed back together.
- Band lanes
- Each audio band is processed separately by the Snapins in its band lane.
- Band mixer
- After the audio bands have been processed by the Snapins in the band lanes they are mixed back together. The band mixed also allows blending between the dry unprocessed signal coming out of the band splitter, and the wet signal which has been processed by the Snapins in the band lane.
- Post FX Lane
- Before the audio signal leaves Multipass the post FX lane provides one last chance to process the audio signal as a whole, after the bands have been mixed down. This can, for example, be a good place to place a compressor or limiter Snapin to keep the signal level in check. The band mixer also controls how much of each band is sent to the post FX lane, and how much is passed straight to the output without post FX processing.
Band splitter

The band splitter lets you adjust the crossover frequencies for the different bands. The spectrum analyzer in the background is a visual representation of the sound as it is when it enters the band splitter (i.e. right after the pre FX lane).
To change the crossover frequencies, click and drag the vertical bars representing the splits across the spectrum. You will notice that you can't drag splits across each other.
As you enable and disable different lanes, splits will be added and removed automatically as needed.
Lanes
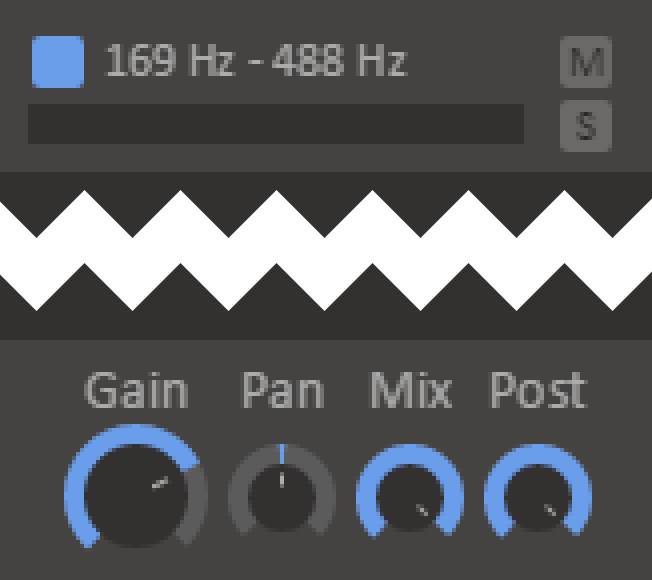 Lanes are divided into three parts. The header, where you will find a few toggle buttons, the main part of the lane, which holds the Snapins in the lane, and the footer where you will find some mixing controls.
In the lane header you will find the following controls:
- Enable button
- This toggle button will turn on or off the whole lane. When the lane is turned off no sound will pass through it at all, and any Snapins sitting in it will have no effect. This will also turn off this band completely in the band splitter, sending the audio that would normally pass through this lane into the lanes next to it. It is advisable that you turn off all lanes that you are not using, to spare some CPU cycles, and to avoid unnecessary phase distortion from the filters in the band splitter.
- Mute button
- A toggle switch for muting a lane. The band splitter will still send audio to the lane, but it will simply be discarded.
- Solo button
- This toggle button will mute all all other lanes. It is useful during sound design if you temporarily want to listen to the audio that passes through just one lane.
In the lane footer you will find some knobs which impact how the output of the lane is mixed down during lane mixing:
- Gain
- Changes the volume of the output of the lane.
- Pan
- Pans the output of the lane left or right.
- Mix
- Adjust the output mix of the lane between completely unprocessed at 0% to fully processed with Snapins at 100%.
- Post
- Adjusts how much of the output of this lane to send to the Post FX Lane for processing. At 0% the output of this lane skips the Post FX Lane completely, at 100% all of the output is sent through the Post FX Lane.
Multiple outputs
While Multipass is a regular effect, it does in fact have 5 additional stereo outputs. Usually these are left silent, but in DAWs that support it Multipass can route the separate frequency bands to these additional AUX outputs. At the bottom of Multipass there is a button which can be toggled between three states: MAIN, MAIN + AUX and AUX ONLY. These three modes determine where to send the output of Multipass: To only the main output, to both main and AUX, or to AUX only respectively. Refer to the manual of your DAW to see how to set up multiple output routing, if possible.
Snapin mode
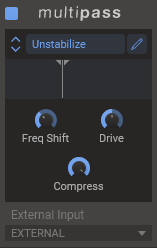
Multipass can also be loaded as a Snapin in Snapin hosts like Snap Heap, Phase Plant or itself. In this mode, the Snapin interface shows all named macros that have any modulation bindings. At the top, up/down arrows can be used to scan through presets and a full browser can be opened by clicking the preset name. To edit the current patch, press the pen icon. This will open the full Multipass interface in a separate window.
The External Input selector allows you to choose which sidechain channel in the Snapin host should be mapped to the external sidechain channel in the contained Multipass instance. (See our guide to setting up sidechains in all DAWs here)