Disperser
Building your sound
Snapin mode

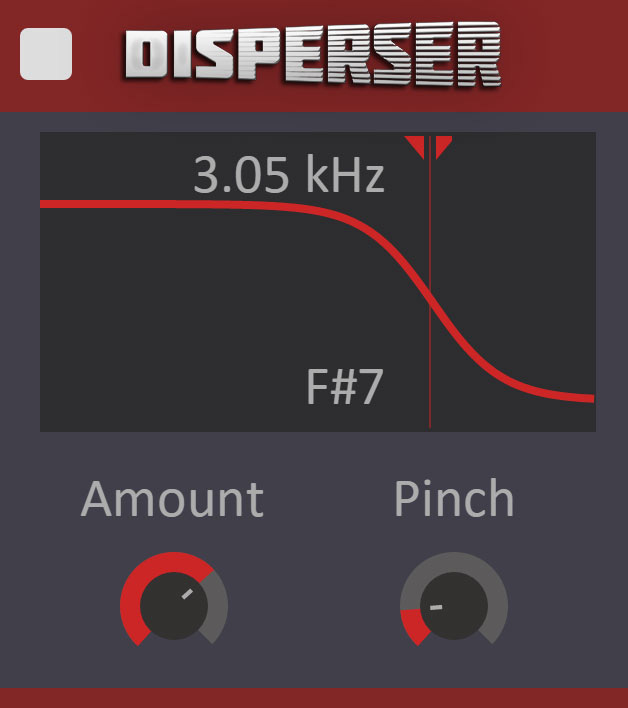
User Interface
Disperser is a stack of all-pass filters tuned to cause frequency dependent delay in the signal. The shape of the delay can be tuned by changing different parameters of the filter through Disperser's user interface.
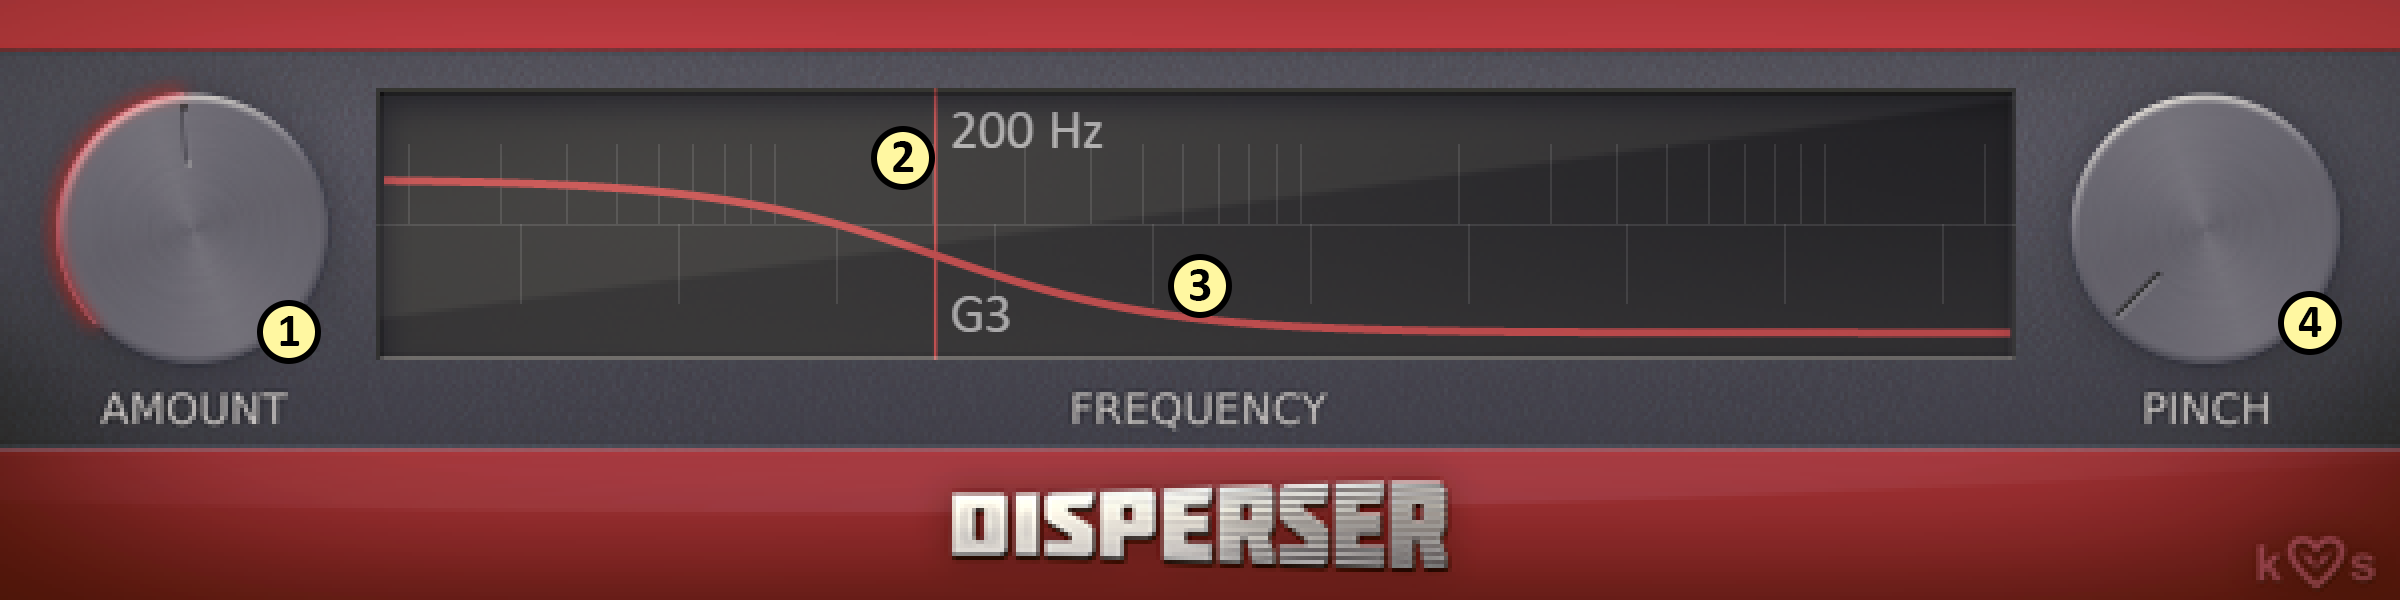
- The amount knob adjusts how pronounced the effect is by increasing the order of the all-pass filter.
- The frequency slider adjusts the cutoff frequency of the filter. Simply click and drag the vertical line in the frequency window.
- The current delay for each frequency is visualized as a group delay curve in the frequency window. The delay is longer where the curve is higher.
- The pinch knob adjusts the Q setting of the filter, which will have the effect of concentrating the delay around the cutoff.
Building your sound
The Disperser is an all-pass filter. This means it has a completely flat frequency response, it does not add any gain whatsoever to the sound you put through it. It does however effect the phase of the frequencies in the signal.
If you leave the amount at a low setting a tiny bit of phase offset will be added to your signal, usually not enough to be audible. It is still a usable tool with a low amount setting however, since it can reduce the "crest factor" of a signal. The crest factor is the ratio between the peaks of a signal, and the overall power of the signal. As an example, a pulse wave with a very narrow pulse width has a high crest factor (it has high peaks, but it still does not sound very loud). Adding a little bit of phase offset to such a signal will drastically lower the peaks, without lowering the volume or changing the sound very much (yay, free headroom!). Human voice can have a surprisingly high crest factor, and many radio stations add a little bit of all-pass filtering on the mics to get more headroom. If you have vocals that sound thin even though you compress them heavily then you may have a problem with the crest factor.
When you start to increase the amount another property of the all-pass filters start to be audible; the group delay. The group delay is a delay which is different for each frequency band. When you have a medium amount setting the group delay can be used as a kind of frequency aware transient shaper. It will transform sharp transients from clicks into short zaps, since the low frequencies will be delayed more than the high ones.
Once you crank the amount knob all the way up the group delay will be even higher, on the order of several hundred milliseconds. This can be used to create some really loud and booming drums! The bass from the drums will be smeared out, and it will sound louder even though it isn't. In fact the peak volume of your drums will probably be lower than before, since all frequencies won't appear at the same point in time.
Apart from sounds with strong transients such as drums and guitar, Disperser can also do magical things to synth bass sounds. Try it on a clean saw tooth baseline to clearly hear the effect that delaying the low frequencies will have on your basses.
The frequency slider sets the cutoff for the all-pass filters. The group delay is a lot more pronounced if you keep the cutoff low.
Lastly, the pinch knob will tweak the Q parameter of the filter. Turn this knob to adjust the shape of the group delay. A high pinch has the effect of concentrating the group delay in a narrow frequency band, hence the name. Crank it up and hear Disperser sing for you.
Snapin mode
Disperser can also be loaded as a Snapin in Snapin hosts like Snap Heap, Multipass or Phase Plant.
In Snapin mode, there is a small downwards arrow visible in the top right corner when your mouse cursor is over the plugin. Click it to reveal a preset information row. At the top, up/down arrows can be used to scan through presets and a full browser can be opened by clicking the preset name.